

In this post, you will learn how to download and integrate LLM/Gemma 4 into your Flutter app and interact with text, images, and audio.
Use it forever for free without an internet connection.
There are lots of open LLMs available on Hugging Face, and one of the best ones to use and test on our device is Gemma 4 because it’s a multimodal model that supports text, images, and audio.
And not only that, it supports multiple languages, not just English. You can try Spanish, Hindi, or any other language.
How do you get these models? You can use Hugging Face.
Here is the link for Gemma 4: HuggingFace.
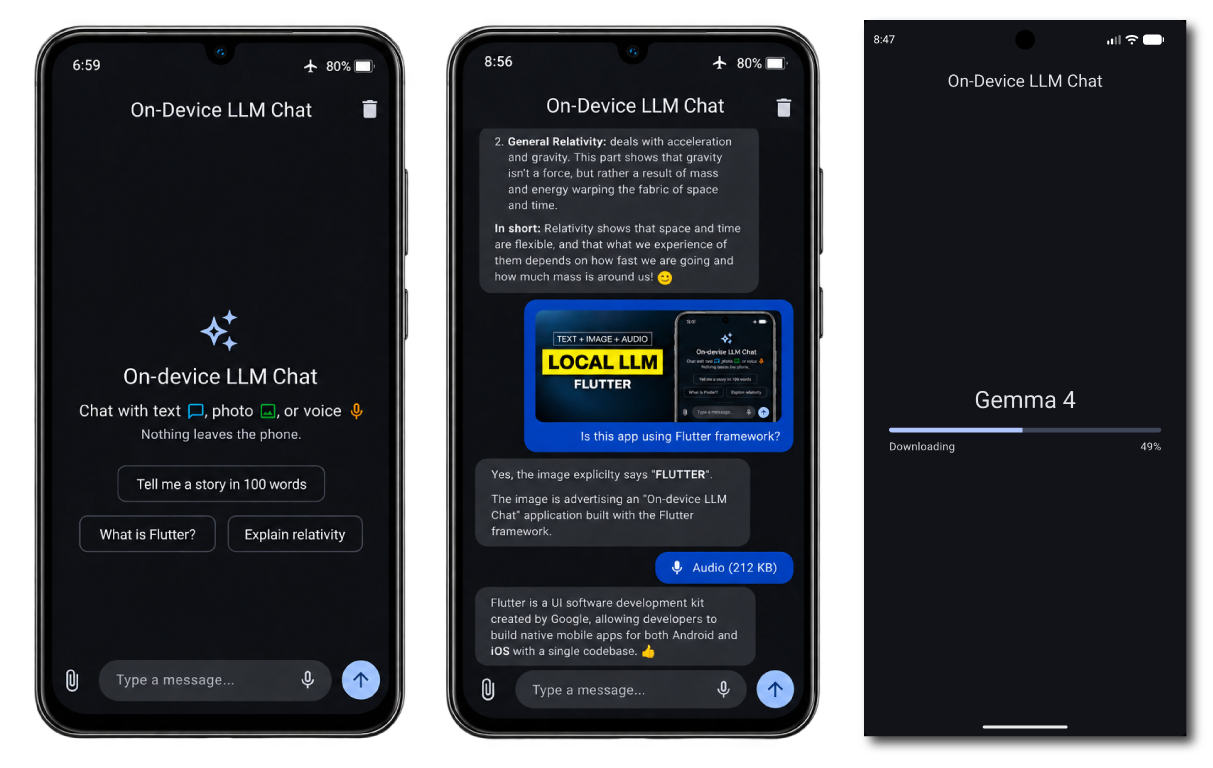
So, what will we make in this post? We will make an Flutter On Device LLM chat app.
So, let’s start with a teaser or demo.

- Playlist: Flutter Offline LLM Chat Series
- HuggingFace: A platform where you can find and download AI models. It also provides a wide range of datasets.
- Litert-lm: A lightweight runtime for running language models on devices.
Here is the link for: Gemma 4 litert-lm

pubspec.yaml
 flutter_gemma: ^1.8.0
  flutter_gemma_litertlm: ^1.6.3
  flutter_markdown_plus: ^1.0.12

  image_picker: ^1.2.3
  permission_handler: ^13.0.2

  record: ^7.1.1
  path_provider: ^2.1.6
- flutter_gemma: It provides api to install and interact with LLM models.
- flutter_gemma_litertlm: It provides LiteRT-LM engine that Runs LLM models.
- flutter_markdown_plus: Provides Markdown support for LLM responses.
- image_picker: Helps pick images from the camera and gallery.
- permission_handler: Helps request permissions from the user.
- record: Helps record and save audio.
- path_provider: Provides a directory path to store audio files.
 await FlutterGemma.initialize(
    inferenceEngines: [LiteRtLmEngine()]
  );
- So in the main.dart file, we will initialize the package.
- These are the permissions and services required to run the app.
 await FlutterGemma.installModel(
        modelType: ModelType.gemma4,
        fileType: ModelFileType.litertlm,
      ).fromNetwork(gemmaUrl, foreground: true).withProgress((percent) {
        downloadPercent = percent;
        _notify();
      }).install();

      _model = await FlutterGemma.getActiveModel(
        maxTokens: 4096,
        supportImage: true,
        supportAudio: true,
      );
      _chat = await _model!.createChat(
        supportAudio: true,
        supportImage: true,
        temperature: 1.0,
        maxOutputTokens: 4096,
        topK: 64,
        topP: 0.95,
        modelType: ModelType.gemma4,
        systemInstruction:
            'You are a helpful on-device assistant. Be concise and friendly.',
      );
- Here, using `installModel` method, we will download the Gemma 4 model file into our Flutter app. Setting `foreground: true` allows the download to continue as a foreground task for longer durations.
- Here, we retrieve the active model using getActiveModel() and enable support for images and audio
- The createChat() method helps us create a chat session. We need to enable support for both images and audio.
- The `temperature`, `topK`, and `topP` values define how the model generates responses.
- Here, systemInstruction tells the model to respond in a friendly manner.
  Message? takeMessage() {
    final text = textController.text.trim();

    if (text.isEmpty && imageBytes == null && audioBytes == null) return null;

    final Message message;

    if (audioBytes != null) {
      message = Message.withAudio(
        text: text,
        audioBytes: audioBytes!,
        isUser: true,
      );
    } else if (imageBytes != null) {
      message = Message(text: text, imageBytes: imageBytes, isUser: true);
    } else {
      message = Message(text: text, isUser: true);
    }

    textController.clear();
    clearAttachment();
    return message;
  }
- After receiving each text, image, or audio input from the user, we need to send it to the LLM using a `Message` object.
- The `isUser: true` property indicates that the message was sent by the user.
  Future send(Message userMessage) async {
    final chat = _chat;
    if (chat == null) return;

    await _responseSubscription?.cancel();

    messages.add(userMessage);
    isGenerating = true;
    _notify();

    try {
      await chat.addQuery(userMessage);

      _responseSubscription = chat.generateChatResponseAsync().listen(
        (response) {
          if (response is TextResponse) {
            draft.value += response.token;
          }
        },
        onDone: () {
          _finishGeneration();
        },
      );
    } catch (e) {
      print('Error sending message: $e');
    }
  }
- Using the addQuery() method, we can send the user’s message to the LLM
- Here, we add the message to the chat and listen for the response from the `generateChatResponseAsync()` method.
- When the response is complete, it will call the onDone() callback.
You can visit github repo link for the code: Flutter On Device LLM Chat
Thats all for today.