DeepSeek’s large language models have become popular because of their efficiency and relatively lower cost compared to many competing LLMs. They have also released open models under the MIT license, making them accessible to developers for building and experimenting with AI applications.
In this tutorial, let’s learn how to integrate the **DeepSeek API into a Flutter app** and build a simple AI-powered application.
Before starting the project, You’ll need
- A DeepSeek account
- An API Key – you need to add at least $2 to your account
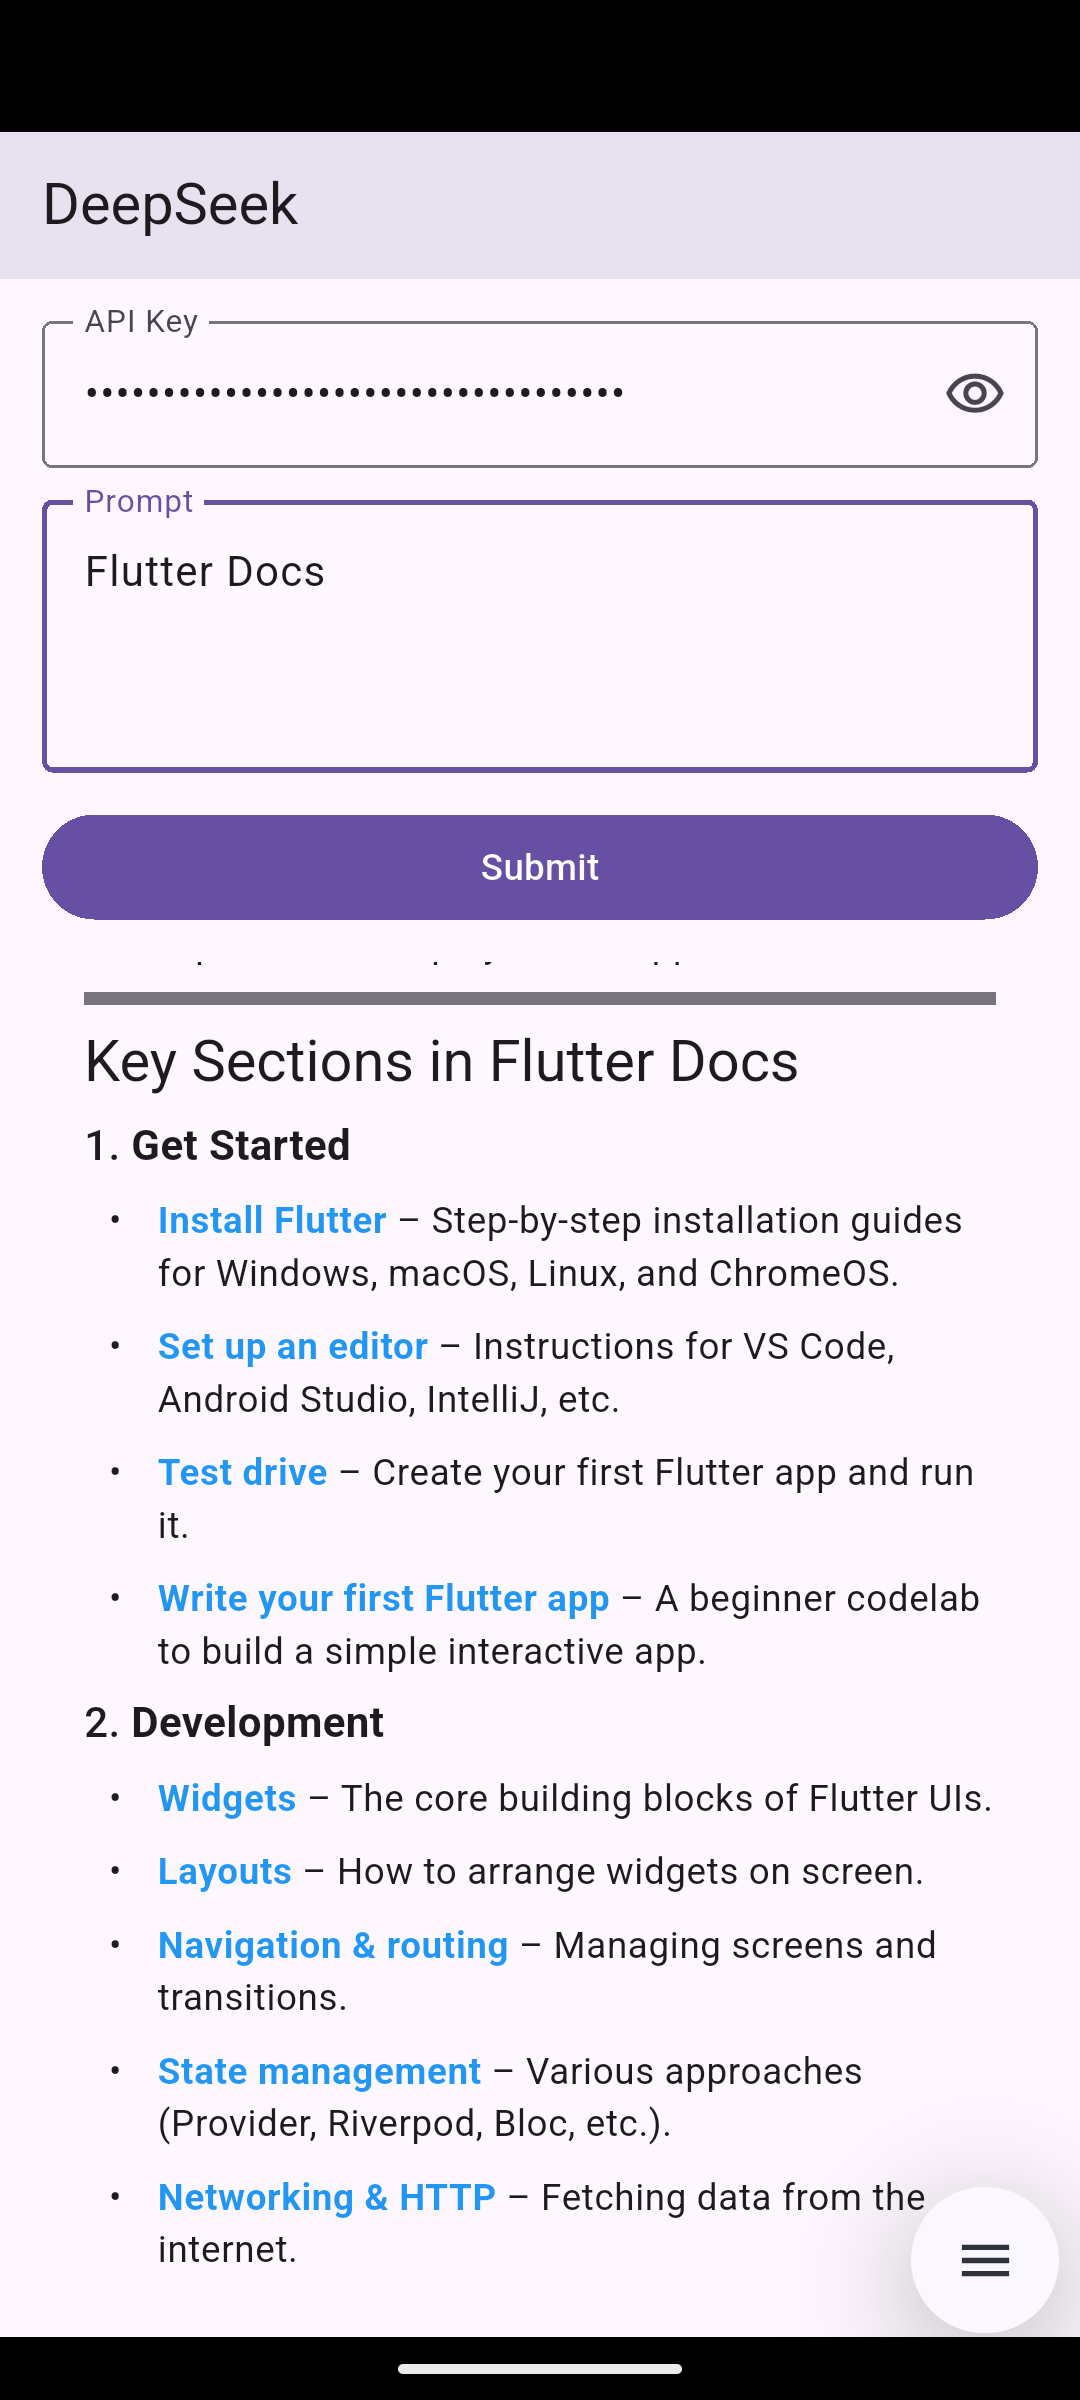
This is what we’ll build.
By default, using an API key directly in the Flutter code is not a good practice. So, for this tutorial, we’ll pass the API key through a text field. For a real application, you can use flutter_secure_storage to store it securely.
We use dependencies,
- http — For API integration.
- flutter_markdown_plus — LLMs typically return responses in Markdown format. This package helps us render the Markdown response in a more readable and visually appealing way.
ApiService.dart
import 'dart:convert';

import 'package:http/http.dart' as http;

class ApiService {
  static const _url = "https://api.deepseek.com/chat/completions";
  static const _model = "deepseek-v4-pro";

  static Future sendPrompt(String prompt, String apiKey) async {
    final response = await http.post(
      Uri.parse(_url),
      headers: {
        'Content-Type': 'application/json',
        'Authorization': 'Bearer $apiKey',
      },
      body: jsonEncode({
        'model': _model,
        'messages': [
          {'role': 'user', 'content': prompt},
        ],
      }),
    );

    if (response.statusCode != 200) {
      return 'Error: ${response.statusCode} - ${response.body}';
    }

    final data = jsonDecode(response.body);
    final content = data['choices'][0]['message']['content'];

    return content;
  }
}
- This code is the simplest version of DeepSeek API integration.
- We need to pass the API key in Bearer format in the headers.
- Our query needs to be passed in a
messageslist, which contains theroleasuserand thecontentas your prompt. - The response data is stored inside the
choicesJSON array as the first object.
main.dart
import 'package:deepseek_api_integration/api_service.dart';
import 'package:flutter/foundation.dart';
import 'package:flutter/material.dart';
import 'package:flutter_markdown_plus/flutter_markdown_plus.dart';

void main() => runApp(const DeepSeekApp());

class DeepSeekApp extends StatefulWidget {
  const DeepSeekApp({super.key});

  @override
  State createState() => _DeepSeekAppState();
}

class _DeepSeekAppState extends State {
  bool _hideApiKey = true;

  final TextEditingController _apiKeyController = TextEditingController();
  final TextEditingController _promptController = TextEditingController();

  String _response = '';
  bool _loading = false;

  @override
  Widget build(BuildContext context) {
    return MaterialApp(
      title: 'DeepSeek',
      debugShowCheckedModeBanner: false,
      home: SafeArea(
        child: Scaffold(
          appBar: AppBar(title: const Text('DeepSeek')),
          body: Padding(
            padding: const EdgeInsets.all(16.0),
            child: Column(
              crossAxisAlignment: CrossAxisAlignment.stretch,
              children: [
                TextField(
                  obscureText: _hideApiKey,
                  controller: _apiKeyController,
                  decoration: InputDecoration(
                    labelText: 'API Key',
                    hintText: 'sk-...',
                    suffixIcon: IconButton(
                      icon: Icon(
                        _hideApiKey
                            ? Icons.visibility_outlined
                            : Icons.visibility_off_outlined,
                      ),
                      onPressed: () {
                        // Handle visibility toggle
                        setState(() {
                          _hideApiKey = !_hideApiKey;
                        });
                      },
                    ),
                    border: OutlineInputBorder(),
                  ),
                ),
                const SizedBox(height: 12),
                TextField(
                  minLines: 3,
                  maxLines: 6,
                  controller: _promptController,
                  decoration: InputDecoration(
                    labelText: 'Prompt',
                    hintText: 'Enter a prompt...',
                    border: OutlineInputBorder(),
                  ),
                ),
                const SizedBox(height: 12),
                FilledButton(
                  onPressed: _loading ? null : _submit,
                  child: Text(_loading ? 'Loading' : 'Submit'),
                ),
                const SizedBox(height: 12),
                Expanded(
                  child: _response.isEmpty
                      ? const Text('Response will appear here...')
                      : Markdown(data: _response),
                ),
              ],
            ),
          ),
        ),
      ),
    );
  }

  @override
  void dispose() {
    _apiKeyController.dispose();
    _promptController.dispose();
    super.dispose();
  }

  Future _submit() async {
    final apiKey = _apiKeyController.text.trim();
    final prompt = _promptController.text.trim();

    if (apiKey.isEmpty | prompt.isEmpty | _loading) return;

    setState(() {
      _loading = true;
      _response = '';
    });

    try {
      final response = await ApiService.sendPrompt(prompt, apiKey);

      setState(() {
        _loading = false;
        _response = response;
      });
    } catch (error) {
      setState(() {
        _loading = false;
        _response = error.toString();
      });
    }
  }
}
- Here, the
_submitmethod gets the data from both the API key and prompt text fields and passes it to theApiService.sendPromptmethod. - Before and after the API integration, we’ll update the state and refresh the UI using the
setState()method. - Always add a
try-catchblock around your API integration code to handle exceptions.
Thats all for today.